Showing posts with label foundation. Show all posts

Friday, 10 April 2015

TUTORIAL: Foundation Single Crochet

I have a brand new pattern with the graphic designer at the moment! So exciting :D However, it uses a LOT of foundation single crochet stitch. To make your lives easier, here is the Crochet Between Worlds Foundation Single Crochet Photo Tutorial! 

--------------------------------------------------------------


FOUNDATION SINGLE CROCHET - PHOTO TUTORIAL 

---------------------------------------------------------------

1. With your hook and yarn, start with a slip knot.


2. Do 2 chain stitch. 


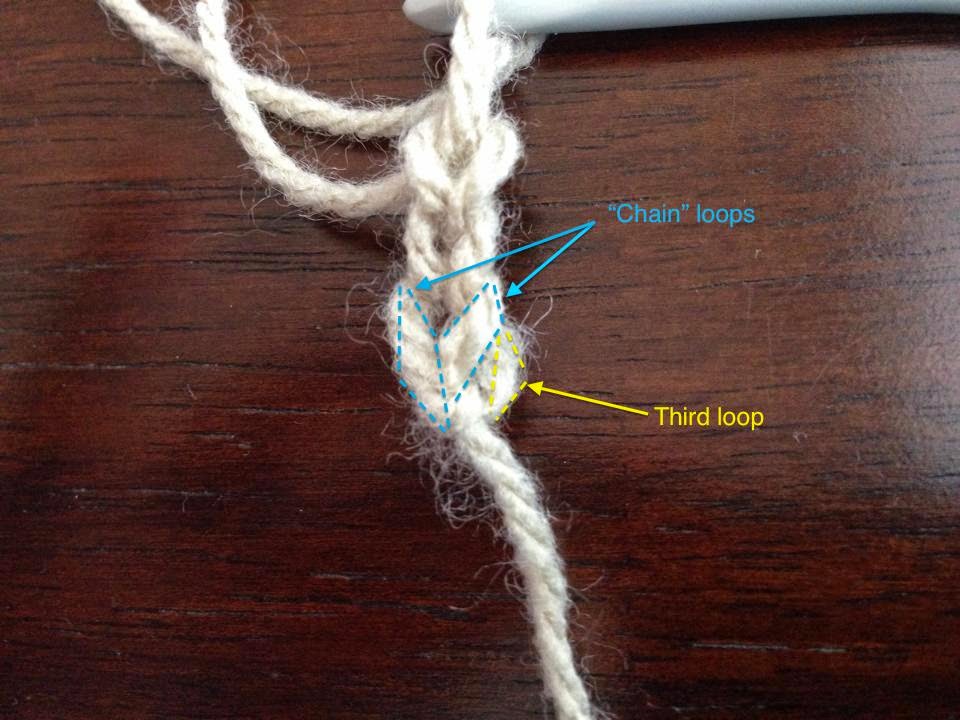
3. Now, look carefully at your first chain stitch (2nd from your hook). There are three threads - the "chain loops" and the "third loop" - I've marked them on this photo for you. You need to insert your hook from front to back through the "chain loops".


4. Yarn over hook, and pull it back to the front - now you have two loops on your hook. 


5. Now the magic begins! Yarn over hook, and bring it through ONLY THE FIRST LOOP, like the photo below. This creates the chains to mimic a foundation chain starting row. 


6. The next step is to make the single crochet stitch - yarn over hook again, and pull through BOTH LOOPS. Tada! You've made your first foundation sc stitch! 

7. This is the part where I was coming undone in other tutorials - where do you put your hook through to start the next stitch? Well, here you go! If you turn the work over so you are looking at the underneath (the "chain" part), you'll see a group of loops. I've labelled with pink arrows which are the "chain loops" that you need to stick your hook through.


Put your hook through those loops from front to back.


Now yarn over hook, and pull through the "chain loops". You'll have two loops on your hook again.  


8. Just like the first time, yarn over hook and pull through the FIRST LOOP only, to create the "chain" section of the stitch.   


9. Then, pull through both loops to create foundation sc #2!


10. Turn you work over again to look at the "chain" side of things. See the next two chain loops that you need to put your hook through to start the next stitch? I've labelled them with yellow arrows below :) 


When you are looking for the next chain loops, make sure you don't pick up the "third loop" by accident! I've spread the threads out a bit and labelled them below. If you start using the "third loop", your chain side will look a bit strange!


Once you've got the hang of it, continue on in the same way: 

FOUNDATION SINGLE CROCHET STITCH - SUMMARY

STEP 1:  Insert hook front to back through chain loops of last stitch, yarn over hook, pull back through chain loops (2 loops on hook). 

STEP 2:  Yarn over hook, pull through 1 loop ("chain") (2 loops on hook). 

STEP 3: Yarn over hook, pull through both loops ("sc"). 

Wednesday, 12 November 2014

Top 5 Crochet Techniques and Tricks

Although I've had a very long crochet career, learning how to do chains almost as soon as I could hold a hook, for most of that time my repertoire has been limited to granny squares. These poor old afghans are now coming apart due to bad knots, wonky joins and of course heavy use.

In the last year or so, my crochet capacity has exploded! I can do all sorts of crazy things, and with the help of the internet, I can make my crocheted items look neater and last longer :) For today's blog post, here is a roundup of my 5 top Crochet Techniques and Tricks (in no particular order) that have made all the difference to my work over the last year!

--------------------------------------------------
TOP 5 CROCHET TECHNIQUES AND TRICKS
--------------------------------------------------

#1

Standing Stitches for Starting New Colours

Hate that "Join new colour, 3ch (counts as first dc)" instruction? Me too. Discovering the Standing Stitch technique has made my work so much neater and with fewer knots, and it can be adapted to ANY stitch! Need to start with a triple treble crochet? No problem! 


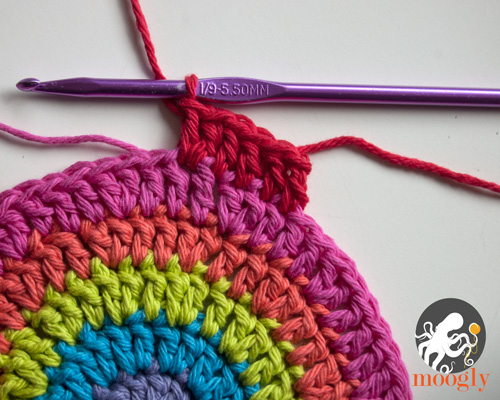
Here's an excellent tutorial from Moogly on how to do a standing dc stitch: 


#2

Invisible Join for Crochet in the Round

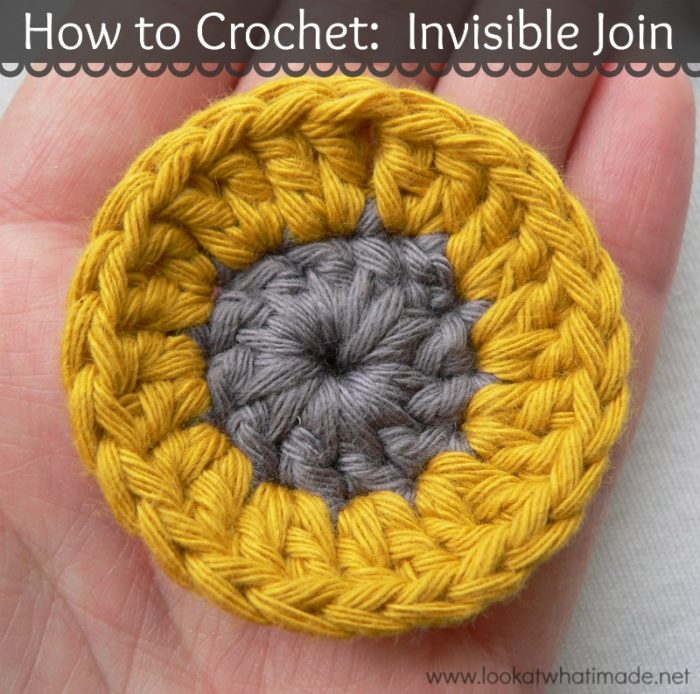
To me, the obvious "slip stitch into first dc, cut yarn and pull through" joining in work just looks so ugly now that I've learned how to do an invisible join. I still do that where a piece might come under strain (and when I'm too lazy to finish off ends properly and securely), but for anything on display? This is the way to go!


Dedri at Look What I Made has an excellent tutorial:


#3

Invisible Decrease

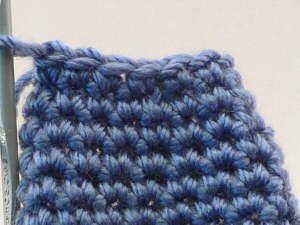
I'm sensing a theme here... but the invisible decrease is just so wonderful for anything amigurumi (including the little giraffe ears and horns for my Heidi Bears animals)! No more weird stretchy holes for me!


For a fantastic tutorial (pictures, words, videos, right handed and left handed), head over to Planet June:


#4

Zipped Ladder Stitch Join

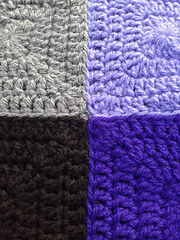
If you're looking for a way to join squares for an afghan (or anything else really) where you want to almost pretend that they are joined by magic, this is the join to use! I use this for my Chunky Fitted Wristwarmers pattern, as it makes the join look so neat, and it's reversible! 


Linda Davie has an excellent free tutorial available on Ravelry, and it even covers how to cope with corners!


#5

Chainless Foundation Stitches

I know this is my tutorial, but this way of starting a project was just such a revelation and improvement on trying to work in tiny chains, and managing tension, and blah blah blah. You can do any stitch using the same method, and even irregular starting rows such as for a ripple afghan!


I have a tutorial for half double crochet, but as I said above, the same technique can be used for any starting row stitch!


Do you have any crochet techniques that you just couldn't live without? Let us know in the comments!

Tuesday, 4 November 2014

PATTERN: Woven Hot Pad / Trivet

About a month ago I was looking for patterns to make pretty, functional heat protection for our brand new, beautiful blackwood dining table at the lake house.  I was settling in my mind on finding something that was double layered for extra heat protection, and possibly some kind of woven pattern. 

A lovely friend linked to Atty's blog where she makes a braided/woven crochet stool cover, and in a later post a pattern for an afghan square using the same technique. I was hooked! So, I took inspiration from Atty's ideas, and changed it (of course) to suit my, er, more quick and dirty method of crocheting. Here is my pattern for a Woven Heat Pad / Trivet, with due credit to Atty for the inspiration :) 

You can also visit the Ravelry page for this pattern to save it to your queue or favourites for later!


---------------------------------------------------------
PATTERN : WOVEN HEAT PAD / TRIVET
Inspired by Atty of http://atty-s.blogspot.nl/
---------------------------------------------------------

MATERIALS:

50g each of two colours 8 ply cotton (or a double strand of 4 ply cotton)
3.5mm hook
Darning needle

In the photo tutorial below, Colour A is Pink, and Colour B is Black.

STRIPS:

Start with 30 Chainless Foundation dc. 

If you're not confident with chainless foundations, either check out my tutorial (for hdc, but you can easily do dc instead) or do 32 chain, dc into 3rd chain from hook, dc into each chain (30 dc).


3 ch, turn. dc into each dc (30 dc). Make sure your first dc is in your last dc from the previous row - the 3ch does not count as a dc. Pull through end and cut yarn. 


Repeats Steps 1 and 2 until you have 12 strips - 6 in colour A and 6 in Colour B. Weave in all your ends.


JOINING

Now to start putting it together! First, have a look at the ends of each strip. You need to get 5 sc into the end of each strip, and these arrows show you where you should be sticking your hook in :P 


Pick up a strip of colour A, and one of colour B. Place them perpendicular to one another, crossing over in the corner. sc through the corner of both strips.


Now, continue on, making sure you get 5sc (matching up with the first 5 dc of colour A and the 5 spots at the end of strip in colour B as shown above). 


See how colour B strip is on the front of your colour A strip? The next colour B strip is going to be attached to the BACK of the colour A strip.


Keep working along, 5sc in each strip, alternating your colour B strips from front to back. At each corner, do 3 sc into the corner stitch instead of 1 :) 


When you get around the corner, continue adding strips, this time of colour A. Make sure you alternate attaching them on the front or back. Don't worry about weaving the strips together at this point - just get them all joined!


Now is when the weaving comes in. 


As you work your way along the long edge of colour A (on the left hand side of the above picture), continue using the same method - 5sc in each added strip, alternating front and back.

Turn the corner again with 3sc and work your way along the bottom, locking the colour A strips into position. In the final corner, do two more sc where you did your sc to start. Slip stitch into that first sc, and it should look like this:


Now, you just need to add whatever border you like! The sky is the limit for borders, do whatever you like :) I did a simple *hdc, ch1, sk1* border on this one, to match the boxy shapes of the woven trivet.


But, you could do shells!


Or even just another row of sc all the way around to finish it off :)


I really enjoyed making these heat pads, and I think they will be VERY useful for the new house at the lake! 

As always, if anything doesn't make sense just leave a comment or message me through our Facebook page. I am here to help you, and this pattern hasn't been tested by anyone other than me!

Let me know if you try making it - I'd love to see your creations and post them on our Facebook page at https://www.facebook.com/crochetbetweenworlds 


Tuesday, 9 September 2014

Tutorial: Foundation Half Double Crochet Stitch

In the last week I have been dipping my toes in the exciting world of crochet pattern design! There will be more news about that in the future :) 

While creating this pattern, I wanted to start it with a foundation half double crochet stitch (half treble for UK readers). This way of starting a project is almost magic - no acre-long chains, no fiddly trying to crochet into chains... perfect for me!  

But I just couldn't do it! I watched videos on youtube, looked at photo tutorials, read descriptions... and it still took me about 2 hours to get a row of it done correctly! I can only assume that there are others in the same boat as me, so here is my first ever crochet stitch photo tutorial!

-----------------------------------------------------------------------------------------


FOUNDATION HALF DOUBLE CROCHET - PHOTO TUTORIAL 

1. With your hook and yarn, start with a slip knot.


2. Do 3 chain stitch. 


3. Now, look carefully at your first chain stitch (3rd from your hook). There are three threads - the "chain loops" and the "third loop" - I've marked them on this photo for you. You need to yarn over hook, then insert your hook from front to back through the "chain loops".


4. Yarn over hook, and pull it back to the front - now you have three loops on your hook. 


5. Now the magic begins! Yarn over hook, and bring it through ONLY THE FIRST LOOP, like the photo below. This creates the chains to mimic a foundation chain starting row. 


6. The next step is to make the half double crochet stitch - yarn over hook again, and pull through ALL THREE LOOPS. Tada! You've made your first foundation hdc stitch! 


7. This is the part where I was coming undone in other tutorials - where do you put your hook through to start the next stitch? Well, here you go! If you turn the work over so you are looking at the underneath (the "chain" part), you'll see a group of loops. I've labelled with blue arrows which are the "chain loops" that you need to stick your hook through.


Yarn over hook, put your hook through those loops from front to back.


Now yarn over hook, and pull through the "chain loops". You'll have three loops on your hook again.  


8. Just like the first time, yarn over hook and pull through the FIRST LOOP only, to create the "chain" section of the stitch.   


9. Then, yarn over hook and pull through all three loops to create foundation hdc #2!


10. Turn you work over again to look at the "chain" side of things. See the next two chain loops that you need to put your hook through to start the next stitch? I've labelled them with blue arrows below :) They look a little twisted - that is ok, it's because I twisted the hook to get a better photo! In the second photo, you can see that the loops aren't actually twisted at all ;)


When you are looking for the next chain loops, make sure you don't pick up the "third loop" by accident! I've spread the threads out a bit and labelled them below. If you start using the "third loop", your chain side will look a bit strange!


Once you've got the hang of it, continue on in the same way: 

FOUNDATION HALF DOUBLE CROCHET STITCH - SUMMARY

STEP 1:  Yarn over hook, insert hook front to back through chain loops of last stitch, yarn over hook, pull back through chain loops (3 loops on hook). 

STEP 2:  Yarn over hook, pull through 1 loop ("chain") (3 loops on hook). 

STEP 3: Yarn over hook, pull through 3 loops ("hdc").