Showing posts with label stylecraft special dk. Show all posts

Thursday, 22 September 2022

FREE PATTERN: The Blanket Stitch, Squared

Hey everyone!

I'm so excited to share a new free pattern with you today! I've been hankering for an easy evening crochet project and decided to make another Wrap with Love blanket. I wondered - could I make this easier for myself and do the same lovely squishy stitch pattern in the round rather than back and forth?

With a bit of experimentation and maths (I never thought I'd do this much maths in my life), I've got it! 


Without further ado, The Blanket Stitch, Squared :D 

Queue or favourite it on Ravelry here: 

----------------------------------------------------------
FREE PATTERN: THE BLANKET STITCH, SQUARED
----------------------------------------------------------

Finished size: 10" / 25cm 

Materials

40g DK/8 ply yarn
4.5mm hook
Scissors
Yarn needle


This pattern uses all US terminology

st - stitch 
slst - slip stitch
ch - chain
sc - single crochet
hdc - half double crochet
dc - double crochet

Blanket stitch block: (sc, 2dc)

Directions:

Make a magic circle.

Round 1 - Into MC, (sc, 2dc) 4 times. slst to first sc, ch1 and turn. (1 block on each side)


Round 2 - In the stitch you just joined to in the round below (so just behind your working yarn), (sc, 2dc, sc, 2dc). *Skip 2st, (sc, 2dc, sc, 2dc) into the next st, which is the sc from the previous round* Repeat * to * 3 times. slst to first sc, ch1 and turn. (2 blocks on each side)


NOTE: Each stitch that has two blocks in it (i.e. sc, 2dc, sc, 2dc) is a corner! In the next row, the corner is worked in the central sc which is bolded above.

Round 3 - In the stitch you just joined to in the round below (so just behind your working yarn), (sc, 2dc). *Skip 2st, (sc, 2dc, sc, 2dc) into the next st, which is the sc from the previous round, skip 2st, (sc, 2dc) in next stitch* Repeat * to * around your square. slst to first sc, ch1 and turn. (3 blocks on each side)


Rounds 4-14 - Repeat Row 3, adding one more blanket stitch block (sc, 2dc) in between the corners of each row. Measure your square after Row 14 to see if you're close to 10"/25cm; if not, do another row or two! 

Round 15 - (make sure you turned at the end of Row 14!) sc in each stitch. In corner sc, work (hdc, ch2, hdc). slst to first sc to finish, cut yarn and weave in ends.


Monday, 23 September 2019

A Prayer-ish Blanket

Hi everyone!

I've been working on super secret projects recently - terrible for blogging and instagram! But I can share one of them with you today :) 

What do you call the agnostic version of a prayer blanket? 

A friend of mine has recently been diagnosed with cancer. I know that cancer is never expected, but this one has been particularly aggressive and particularly fast-moving in someone too young and healthy. The news hit and I felt what I think everyone around feels in this situation - what on earth can I do? 

Anne sadly has some experience in this area so I asked her - what is the most helpful thing that I could do to make my friend feel supported and loved through the horribleness that is cancer treatment? She said, make him a blanket to keep warm during radiotherapy sessions. It needed to be soft and machine washable. 


I had less than a week before we were going on holidays for two weeks, so with a smoking hook I tore through my Special DK stash for the brightest colours, and used this Ocean Breeze pattern and a 5mm hook for speed and texture! 24 squares made the perfect sized blanket, and it will be useful once he's better as a throw for the couch, or a single bed blanket. Fortunately Allie spent a weekend with her grandmother which gave me some extra assistance-free hours to watch movies and crochet as fast as humanly possible. 

Inspired by fellow Stylecraft Blogstar Polly Plum's Arabella CAL  I used Stylecraft Wondersoft Merrygoround in Rainbow and a continuous sc join in the back loops to put the squares together! It saved so many ends - I can never go back to the old crosshatch style of joining square blankets again! A border in the same Rainbow yarn finished it off beautifully. 


To get the same number of stitches on each side, the "squares" ended up more rectangular which meant that when they came together it wasn't very square! I did decide that the wavy lines were more of a design feature than a flaw though - what do you think? 


My mum, amazing as she is, whipped up a super quick drawstring bag for the blanket to be kept in, for schlepping back and forth to the hospital every day. 


Good luck friend - may you be warm and cured <3 

Wednesday, 14 December 2016

Star Blanket Love


Hihi!

How are you doing today? Guess what? I was down with a nasty cold again. Nothing new I know. Ugh, I feel like I can't catch a breath this year (or rather the last three years?). If any of you knows a great trick on how to avoid these colds, any advice is greatly appreciated!!

Since I have been feeling unwell, I haven't crocheted quite as much as I wanted to but still there was some good hooking time! I wish we had an open fire oven - that would make the crochet time so much more cozy, don't you think? My parents always had fireplace so I kinda miss it. Someday we shall have one too - I will make sure of this! :)


Lately I have been addicted to the star blanket pattern! It is so relaxing and the end result is stunning. This blanket is still a work in progress because I ran out of yarn. I sure wasn't expecting for one color to take more than 100gr of yarn but the last two colors do! I put in my order with Deramores some days back and it finally arrived after over three weeks. The parcels were sent to Sweden first (no idea why!), plus one of the parcels ripped and killed a skein. I am not to happy with the delivery and the packing - not sure I will order with them in the foreseeable future. It kind of depends on how long the replacement skein takes to get here...


Oh in case you are wondering: I am using Stylecraft Special DK and the blanket will have 8 colors in total. It will be a gift to a little boy/girl who will be born in April.


Oh and look at this adorable pic! The little boy was born in November and his mum send me this picture (which I am allowed to share). :) I love, love getting pics of my blankets in use!


I also finished this little charmer. The pattern is from Isabelle Kessedjian and very well written. I changed bit though as I hate to sew the head onto the body. Instead I worked the head pattern backwards, so I could continue crocheting from the body part. 


I hope you have a wonderful advent time!

Take care
Anne


Tuesday, 15 November 2016

Ta-Dah! Carousel CAL!


Ta-dah! Our Carousels come to an end! 


You can download the final Part Six of the Carousel Crochet-Along, designed by Sue Pinner and hosted by Stylecraft Yarns from the Stylecraft website NOW, in English (US and UK), German and Dutch.


Only one tip this week - you'll need about 40g/110m of yarn for the last row, so consider starting a new ball if you have less than that available in the ball you've already started. Enjoy finishing your masterpieces! 

I took lots of photos of my Batik DK and Special DK Carousels - I am so happy with the end product!


For the Special DK Carousel, I finished with a round of crab stitch (or reverse sc) instead of the edging pattern. 


And then I had some fun with my HeidiBears animals - it's Circus Time!


Thank you all so much for coming with us on this journey :) We hope we've helped smooth the way on your Carousel, and you enjoyed it as much as we did! 


Tuesday, 1 November 2016

Carousel CAL - Part 5

Nearly there! Our Carousel blankets are getting huge now :D Good for those of us in the Northern Hemisphere, but here in Australia summer is getting started, and working these gorgeous blankets is a bit hot!

Part Five of the Carousel Crochet-Along, designed by Sue Pinner and hosted by Stylecraft Yarns has just been posted, and is available to download NOW from the Stylecraft website, in English (US and UK), German and Dutch.


If you haven't set up a Ravelry project yet, the pattern page can be found here: http://www.ravelry.com/patterns/library/carousel-cal  

We are working the CAL along with you all, and will post our tips and tricks for each part at the same time as the pattern is published over at the Stylecraft website. 


Please feel free to ask any questions in the comments or on our Facebook page (https://www.facebook.com/crochetbetweenworlds/) - we are here to help you. Anne is doing the German translations for the CAL again, so ask away in German too!

Part Five, the Ripple Border:

Our top tips for the Ripple Border are:

1. Colour charts! I've created them again for the Ripple Border to make the colour lists easier to read and follow. Download your required colour chart from these links:

NOTE: For each row, you follow the column down; so the first colour of row 1 is in the top left corner, the second colour is below, etc. 

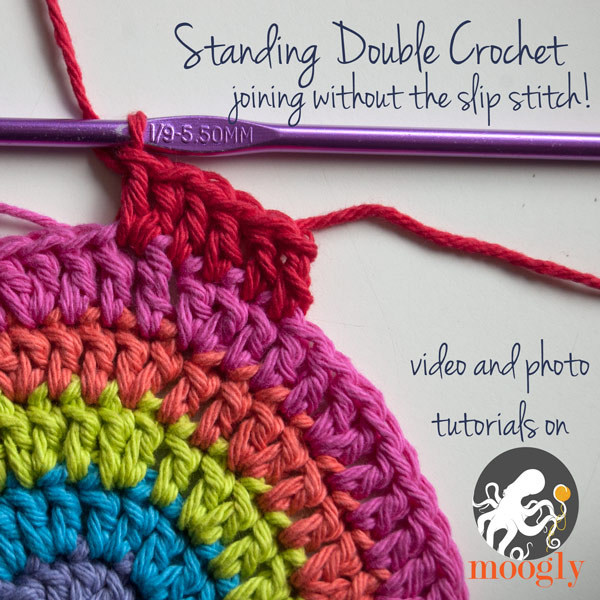
2. Standing dc at the start of each round! 


3. Yes, it looks like a big gap when you skip stitches in round 1! But count and you'll see that you're only skipping two dc :) 


4. I did a different colour change method for each blanket - in the Batik I followed Sue's instructions to the letter, and in the Special DK I completed the last dc, and then changed colour. They sit slightly differently to each other; maybe do a test and see which you like better? 


We hope these tips help you! 

Check back here in two weeks on Tuesday 15 November for Part 6 - the Edging :D

Tuesday, 18 October 2016

Carousel CAL - Part 4

I hope you all enjoyed the Pentagons a fortnight ago! This week we go one side better and make Hexagons :P 

Part Four of the Carousel Crochet-Along, designed by Sue Pinner and hosted by Stylecraft Yarns has just been posted, and is available to download NOW from the Stylecraft website, in English (US and UK), German and Dutch.


If you haven't set up a Ravelry project yet, the pattern page can be found here: http://www.ravelry.com/patterns/library/carousel-cal  

We are working the CAL along with you all, and will post our tips and tricks for each part at the same time as the pattern is published over at the Stylecraft website. 


Please feel free to ask any questions in the comments or on our Facebook page (https://www.facebook.com/crochetbetweenworlds/) - we are here to help you. Anne is doing the German translations for the CAL again, so ask away in German too!


Part Four, the Shaped Hexagons:

Our top tips for the Shaped Hexagons are:

1. The Hexagons provide more practice for everything we've learned so far: padded centres, standing stitches, numbered pieces, join-as-you-go... I've linked our previous Tips posts below, and recommend having a flick through before you start your Hexagons. 


2. Colour charts! I've created them again for the Hexagons to make the colour lists easier to read and follow. Download your required colour chart from these links:


(to use find/replace if you are using different colours) 


3. After Row 4 your hexagons will curl up. That's ok - it will flatten out again as you get further out. 


4. If you're using the little paper numbers to keep track of which piece is which, you can save on stitch markers (and moving them every row) and pin them on the hexagon towards the outside point once you've done Row 5. 


5. I got to rewrite the joining instructions for this part, so hopefully they are easy to follow! 

You'll be joining to other shapes on all sides (so no awkward band joining), and if you get lost just remember - slip stitch into the adjoining stitch on the sides of each hexagon, and in the corners, replace chains with slipstitches into adjacent corners.  

For a little extra help, I made this short video showing how I joined the Hexagons in. Totally unofficial and not approved by Sue or Stylecraft, but hopefully it will help you visualise the instructions :)


We hope these tips help you! 

Check back here in two weeks on Tuesday 1 November for Part Five - the Ripple Border :) 

Tuesday, 4 October 2016

Carousel CAL - Part Three

The Pentagons are finally here!

Part Three of the Carousel Crochet-Along, designed by Sue Pinner and hosted by Stylecraft Yarns has just been posted, and is available to download NOW from the Stylecraft website, in English (US and UK), German and Dutch.


If you haven't set up a Ravelry project yet, the pattern page can be found here: http://www.ravelry.com/patterns/library/carousel-cal  

We are working the CAL along with you all (Anne in the new Batik yarn, and Michelle in Special DK, and will post our tips and tricks for each part at the same time as the pattern is published over at the Stylecraft website. Anne is still catching up after her holidays :)

Please feel free to ask any questions in the comments or on our Facebook page (https://www.facebook.com/crochetbetweenworlds/) - we are here to help you. Anne is doing the German translations for the CAL again, so ask away in German too!

Part Three, the Pentagons:


Note: All the below tips use US terminology.

Our top tips for the Pentagons are:

1. Yep, I'm recommending standing stitches again! 

For these cute little pentagons, you'll mostly need the joining standing stitch rather than the stacked one, as you change colour for each row.

Standing dc (US) or tr (UK) tutorial by Moogly


2. Finding the colour lists hard to follow? I've made a handy table for the colours of each row for each pentagon, in both yarn types, that you can download here:

Part 3 - Pentagons - Special DK

Part 3 - Pentagons - Batik DK

If you're using other colours, you can download the Word doc tables and find/replace with your colour plan here: 

Part 3 - Pentagons - Word Doc (both yarns)


3. To keep track of colours whilst working a round at a time on each pentagon (so if you prefer to do all the Round 2, then all the Round 3, etc), pin a little piece of paper with the pentagon number into the centre of each piece! You can then leave the pinned paper attached to the middle for as long as you like - as you can see in my finished picture at the top of this post, I left them on until all were joined in.


I used sewing pins because I like to live dangerously, but it would probably be safer and less owwie if you used little safety pins. 

4. Join Pentagon 1 to a Cream band! Then, as you go around, you'll be joining the Cream pentagon to a Lipstick/Cherry band, and the Lipstick/Cherry pentagon to a Cream band :) 


5. The Join As You Go method of joining is fabulous - no sewing! In case you're not experienced in this yet (and you will be by the end of this beautiful Carousel), here's what I did, which might help you.

NOTE: THESE TIPS MIGHT BE A BIT DIFFERENT TO WHAT BABS DOES IN THE VIDEO AND MAGGIE DOES IN THE CHARTS. It's up to you how you want to do the joining. 

First Pentagon - The instructions are lovely and detailed for this first join, you shouldn't need any help from me!

Second - Fifteenth Pentagons

Side 2, First Joined Corner: after the dc in the corner space of the pentagon you're doing the final round of (we will call this PentagonA), do ch1, then slst into the corner space of the pentagon you're joining to (PentagonB from here on). Ch1 again, then do your second dc into PentagonA. (slst into corresponding dc of PentagonB, dc into next st of PentagonA) to the end of the row, and then slst into the second last dc of PentagonB, dc into corner space of PentagonA, slst into last dc of PentagonB. 

Side 3, Second Joined Corner: slst into corner space of PentagonB, ch1, slst into first st of banding strip. 


dc again in corner space of PentagonA, then (slst into next dc of banding strip, dc into next dc of PentagonA) to the end of the row. 


dc into the corner space of Pentagon A, slst to the last st of the banding strip, ch2.


Then, continue finishing off the last row of your pentagon as normal :)

Sixteenth Pentagon

Side 2, First Joined Corner: same as above.

Side 3, Second Joined Corner: same as above.

Side 4, Third Joined Corner: dc into corner space of PentagonA, slst to the last st of the banding strip, ch1.


Then, slst to the corner space of the first pentagon you joined (We'll call this PentagonC for ease of reference). dc into the PentagonA corner space again, slst to the first dc of PentagonC. (dc into next st of PentagonA, slst into next st of PentagonC) to end of row.


Side 5, Fourth Joined Corner: dc into corner space of PentagonA, slst to the last st of the row of PentagonC. ch1, slst into corner space of PentagonC, ch1, then finish off the last row of PentagonA as normal.


We hope these tips help you! 

Check back here in two weeks on Tuesday 18 October for Part Four - the Shaped Hexagons :) 

Wednesday, 28 September 2016

New Project: Colour Planning Made Easy!

Hi everyone! 

The busy time is starting to finally tail off around here - I ended up leaving the Law Society job because it was too much for the fatigue monster to manage, then got a sizeable crochet order finished, and now the Carousel CAL has settled into a nice sedate rhythm (can't wait until we get to play with pentagons next week!). 

So, I've had a bit of a chance to pull out some long-considered ideas about how to make things easier for myself to plan out colours for crochet project. 

How many of us have done this before to work out a rainbow, or grades of colour for a project?


It's messy, takes up a lot of space, and gets yarn ends all tangled up (or at least it does for me). I've seen Lucy's gorgeous peg system, and a few other similar ideas (yarn wrapped on embroidery thread cards, paddlepop sticks, etc etc) but I don't think those would suit me. I need really secure, solid colour samples, that pack up really small and light, and to avoid using my terrible handwriting on anything! 

I do have the Stylecraft Special DK shade card (now somewhat out of date)...


...but it's not great for seeing how different colours look together. 

The solution? Two inch, two-row solid granny squares in each colour, with the colour name and number stapled on the back! I started with the new Stylecraft Batik range to see if it would work (only 16 colours at the moment).


Ta-dah! The staples are really secure, but barely show on the front of the square. I made a little chain string for them out of scrap yarn and a button, and now they are hanging on one of my drawer handles, ready to pick colours! 


Next stop: the Special DK, which currently has 74 colours (gulp).


In anticipation of getting around to doing this, I've been making a solid granny square out of each colour as I pick them up to work something. There's... 30 so far. A long way to go, but once it's done it should be far far easier to choose colours for a project! My husband is tracking down a large hinged plastic or metal ring that I can string the squares onto, so it's easier to just open the ring at the colour you want rather than having to pull them all off. 

EDIT: Giant Hinged Rings are called Jailer's Keyrings! Thanks craftymummy! 


Now, I am spoiled by mostly working in my fave Stylecraft yarns, but if you have a range of brands in your stash, you could mix up all the colours of the same weight (just add the brand and "model" to the paper tag) and put them all on one ring! 


Do you have a colour sample collection like this? Would it be useful to your project planning?