Showing posts with label ta-dah. Show all posts

Tuesday, 11 July 2017

Adventures in Knitting: "I can have a dark side too..."

Hey everyone!

Two weeks ago I took a great leap over to the dark side - I learned how to knit :o (Thanks to Tim Minchin for the post title!) 

I had done knitting in primary school (quite some time ago now!), and every so often picked up a set of needles to have a go, but just never really enjoyed it, or at least not enjoyed it as much as crochet. Crochet is faster, you can't drop stitches (or if you do it's not a drama in the slightest), and I can do it much better! I have always had the dream of knitting socks though, which seemed roughly equivalent to climbing Mount Everest but without the fun party times.

Then, my lovely friend Emily who can knit wonderfully asked if she could trade knitting lessons for advice about uni courses, and I felt ready. This was the moment. It was time.


After learning the basics - cast on, knit, purl, slip, increase, decrease, cast off - I was ready to start a real project. A knitted Wrap with Love square!
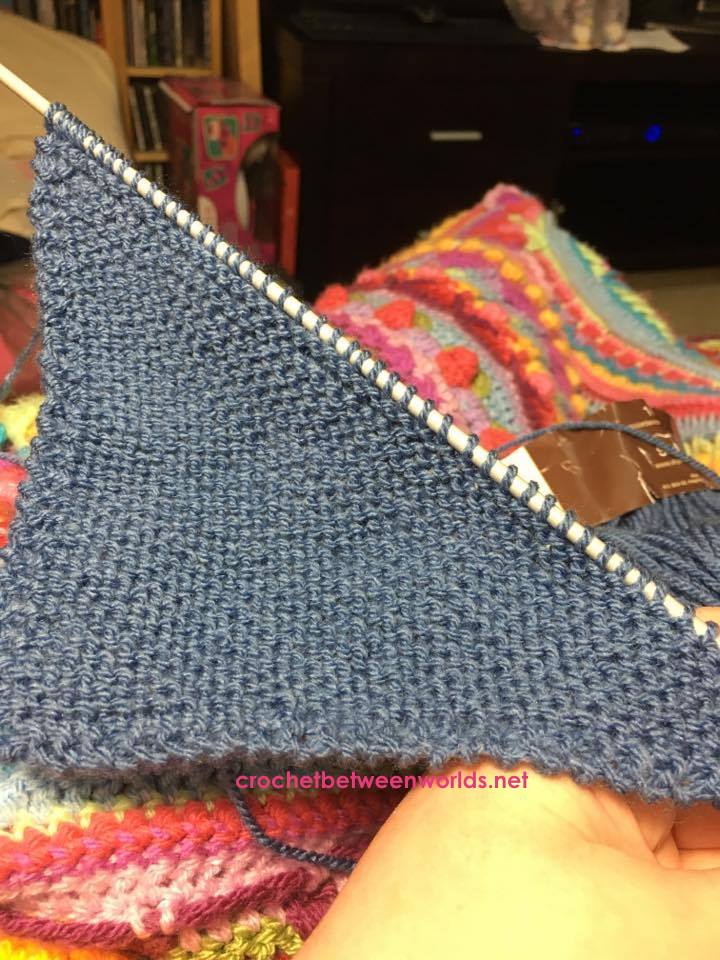

It worked! It came out a bit big, but after undoing one row I decided I didn't care that it was a bit too big. Knitting is wayyyy harder to frog :(


So, how hard could socks be? They thought I was mad, mad, MAD! *insane cackling* 

This gorgeous ball of Stylecraft's Head Over Heels sock yarn fell into an online shopping basket quite some time ago (I think I needed to get to $100 for free postage, and much better to spend a bit extra money on yarn than waste it on postage). It's a wool/nylon blend which I am told is ideal for socks, and didn't feel super itchy - maybe I could even tolerate having woolly socks? Spotlight provided 3mm knitting needles, and then it was time to choose a pattern

After much perusing of Ravelry, I chose the Just Plain Socks pattern by Talena Winters - It is free! Has ribbing! Multiple sizing options! Intermediate difficulty? Bah, I'm sure it will be fine.


Oh man, I thought knitting with two needles was complicated. Four? FOUR? It took me nearly two hours to knit the first inch of the cuff. Maybe knitting wasn't for me - I could nearly have a pair of crochet socks done in that amount of time. But I persevered. The yarn was working up in adorable stripes, and I was getting the hang of it. Slowly. 


The texture of the back of the heel was awesome, plus knitting goes way faster if you slip every second stitch ;) 


Now, it was heel turning time. This was the part I was most afraid of - I'd read about terror of turning heels in novels and thought this, this is where this experiment is going to fall apart.

Buuuut...

I did it! I just followed the pattern step by step, and then there was a heel turned. If I can turn heels, I can do ANYTHING.


Gusset? What on earth is a gusset? What on earth am I doing? Oh no wait, this is ok. Picking up stitches is ok. We can do this. I even did a Kitchener graft to close the toe (although I do need more practice...). 


I measured Kiah's foot as instructed, and knitted to the measurement as per the pattern, and then he put the first ever finished sock on. 

DISASTER.

It was too long! After the experiments with the Wrap with Love square, I was 100% not excited about doing any undoing. After a few minutes of blind panic, I remembered that my little brother James has enormous feet (AU mens size 13-14 - if I put my feet in his shoes, I can see my standard sized toes before the laces start). I texted him to see if he would be interested in hand-knitted socks and he said YES! Crisis averted!

Sock 2 went much faster, and I had lots of fun learning how to count rows to make it identical to the first one. 


I am so thrilled with the outcome, and totally pumped to make more socks and do more experiments in knitting! For now I have to get back to the crochet WIP pile but more knitting is definitely in my near future <3 

What are you favourite interesting knitting patterns for adventurous beginners? What techniques, stitches and skills should I learn next?

Tuesday, 18 April 2017

Ta-dah! The Peacock Double Spiral Afghan

Hey everyone! 

There's projects going on left right and centre here, including some super exciting stuff that we can't talk about yet ;) 

So for today, I'm going to share my finished Peacock Double Spiral Afghan with you!


My friend Lori wanted a snuggly blanket to go along with the ones I have made for her children, in peacock colours, and something a bit crazy and possibly paisley inspired. After some thought, I remembered buying this gorgeous Kaye Adolphson Double Spiral Throw pattern aaaages ago because it was so beautiful, but hadn't had the opportunity to make it yet - this was the moment! Lori also loved it, and after much discussion we came up with the colour selection in my very favourite (and colourful and hardwearing) Stylecraft Special DK. The colours are Mustard, Gold, Grass Green, Green, Teal, Empire, Royal, Turquoise, Emperor and Lobelia.


The next challenge was randomising the colours! As you know, making something look actually random takes a lot of preparation - I made up a table of colours, and when I needed extra spirals I outsourced to a wonderful engineer friend who is pretty amazing at spreadsheets! 

The double spirals were lots of fun to make (despite all the ends), and I got into an excellent rhythm working on those while watching tv, and my siblings playing the new Zelda Nintendo game. 


Rather than 5 x 5 spirals, I ended up making it 7 x 5 (so 35 double spirals) to make it a bit longer and more cuddly for an adult to snuggle under on the couch. It finished up about 1x1.5m. 

I decided to do the joining before the slipstitch detailing, in case blocking required more stretching and persuasion than the slipstitching would allow. And... oh man, the joining. I won't lie, the blanket very nearly got tossed off the balcony a few times! 

After doing a practice join 4 times, having it not sit even close to flat each time, and frogging whilst doing lots of swearing, I reached out to the designer for help. Kaye kindly sent me some higher quality, more detailed photos of the joins, which really helped. Thanks Kaye! I am hoping she will add those photos to the pattern as well so that future crocheters will have an easier time of it. The key was giving up any expectation I had of being able to do it evenly and regularly, and embracing the fudge. I do not like fudgy crochet.


After a preliminary block (just with water, which did very little), I worked the slipstitch detailing on the double spirals and the mini-spirals that fill the space between the double spirals. Using one colour cut down on the ends, but it still took a long time, and many many many more ends. I need a new yarn needle as all the silver has come off!! 


Final blocking time! I read up online about steam blocking acrylic, as this blanket was going to need some pretty intense help to get it to sit even vaguely flattish. I borrowed my Mum's steam iron, washed the blanket, slithered around on the floor on my stomach getting it all viciously pinned out, and started steaming... and brown lumpy goop splattered out along with the steam. Plus, it seemed to all be rising rather than going into the blanket. It was time for some creative thinking! 

My husband sprayed the blanket generously with cool water, and we let it soak in for a while. Then I put on a podcast, stuck my headphones in, and let rip with the hairdryer on high, moving slowly across each section until they felt warm and less damp under my fingers. We then left it all pinned out and went away for the Easter long weekend... 


And, it worked! The edge is still frilly (but was impossible to block, so I'm calling that a feature), and it's not 100% flat but looks much less like a coral reef! 


The slipstitching looks so good contrasted with the royal blue joining colour, and really brings it all together.

So, in summary: I'm glad I made this once, but I am in no hurry to make another one!

Monday, 28 November 2016

Ta-dah! My First African Flower Kitty!

I absolutely love the African Flower animals, and expanding my repertoire - and this week I got to make my first African Flower Kitty!

There was no HeidiBears cat pattern available (sadly), but Jo's Crocheteria helped me out with Luna the African Flower Cat. 


My talented mother dyed this stunning purple yarn - it almost glows! I am happy with the way it came out, although there are always things to do better next time :P 

The pattern was quite challenging to decipher, especially without any photos of what the body looked like without the hind legs attached. So, if you want to make this kitty for yourself, here's a legless picture to help you out! 


I ended up having to talk through the instructions with my mum who is much more spatially talented than me, but we got there in the end!


I made a few little changes - I added a mini African Flower triangle nose, some whiskers (just black cotton knotted on each side of the nose) and did something different for the eyes. Rather than the closed eyelashes specified in the pattern, I used Repeat Crafter Me's Black Cat Hat eye pattern! I do like an awake kitty better than a sleeping one ;)


It's now off to its new home, and I already have another order lined up! The rest of this week is going to be sanding down the WIP list - and next weekend we are off to Yass for a baby shower. I'm so excited!!! 

To finish, this is the most common cat angle we get to see around our house... :P


Tuesday, 15 November 2016

Ta-Dah! Carousel CAL!


Ta-dah! Our Carousels come to an end! 


You can download the final Part Six of the Carousel Crochet-Along, designed by Sue Pinner and hosted by Stylecraft Yarns from the Stylecraft website NOW, in English (US and UK), German and Dutch.


Only one tip this week - you'll need about 40g/110m of yarn for the last row, so consider starting a new ball if you have less than that available in the ball you've already started. Enjoy finishing your masterpieces! 

I took lots of photos of my Batik DK and Special DK Carousels - I am so happy with the end product!


For the Special DK Carousel, I finished with a round of crab stitch (or reverse sc) instead of the edging pattern. 


And then I had some fun with my HeidiBears animals - it's Circus Time!


Thank you all so much for coming with us on this journey :) We hope we've helped smooth the way on your Carousel, and you enjoyed it as much as we did! 


Wednesday, 7 September 2016

Ta-dah! The Lotus Moon Tiles Afghan

Hi everyone! 

Today is going to be mostly pictures... because I've finished the Lotus Moon Tiles Afghan by Polly Plum! Made using all Stylecraft Special DK (as a stashbuster), it has 24 lotus flowers, and finished up at 100 x 150cm. All the yarn colours are over on my Ravelry project page.


The pattern was so well written and introduced me to more new stitches and techniques. It's made up of octagons...


... squares...


... and triangles.


Kiah and I took it down to the riverside this afternoon to take some pretty pictures! And, well... I think the pictures speak for themselves <3 I love sunset for crochet photos!


Such a glorious bundle of rainbows! 


Tuesday, 12 July 2016

Frida's Flowers CAL - Edging and TA-DAH!

Congratulations on reaching the end of the Frida's Flowers CAL! The edging instructions have just been uploaded to the Stylecraft website in English (UK and US), Dutch and German - head over there to download now: http://www.stylecraft-yarns.co.uk/Crochet.htm. Thank you all so much for coming on this adventure with us! We have had a great time, learned a lot, and can't wait for the next Stylecraft CAL :D


I didn't record yarn usage for the edging, as there was no need to see how much was left! I came very close to using up all the black, but did not run out of anything. 

Here's a closeup of the finished edging:


Our top tips for the finishing off are:

1. Don't be afraid to join the pieces in a different colour to black! 

I joined my central flower in Greek Blue, and totally love the effect. I would have had enough black to do it, but as usual totally overestimated how much yarn I would need.


2. In Round 1 of the edging, where you do 3sc together in the dip of the zigzag edge, don't work into the joined stitches, just in the join. 

Hopefully the picture below will make this clearer :P If you are just more confused, ignore me!


3. There's a bit of fudging required in Round 2. My counts up to this point matched Jane's perfectly, and I still had to do some stitch-skipping to get the scs to land in the right places! Don't worry about the exact stitch count - after Round 2 everything will work fine.

4. Blocking. You don't necessarily need to block your Frida, but it does help the flower petals sit neater if you're working in the cotton or life dk (for 100% acrylic yarns, I find blocking is less effective). I just washed mine in the washing machine on a very gentle cycle with woolwash, pinned it out on my foam blocking boards and let it dry over a few days out of the sun. A bit of a wash helps the cotton soften up as well!


For our tips from previous weeks, visit:


Inspired by some of Frida Kahlo's artwork with lavish jungle/forest scenes in the background, I tracked down some urban jungle of my own to take some more photos! 


- Michelle & Anne xx