This is our 100th blog post! Thank you all for reading and supporting us! We love all your comments and shares and saves on Bloglovin :)

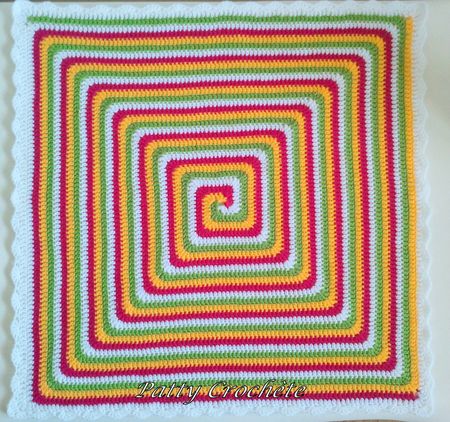
And as a special present just for all you wonderful readers, here is my brand new pattern (with photo tutorial): The Double Spiral Square Motif!! As you know, I'm a bit mad on spirals. After I did the translation of Patty Crochète's gorgeous Solid Spiral Granny Square, my lovely friend Angela from Get Knotted Yarn Craft sent me this picture of a doona cover, and suggested that maybe the solid spiral granny could be converted to make this double spiral square:

What an idea! I spent way too many hours and brainspoons figuring out how to do the spiral with two colours instead of four, and then how to connect opposite ends of the squares to make it spiral like this... and here it is, with a photo tutorial! It has only been lightly tested, so please let me know if something is unclear, or needs more information/photos :)
What could you do with this motif? The sky's the limit! I can see two of them sewn together and lined to make a little pencil case; or stitch a whole bunch together to make an afghan; or as an accent row in a groovyghan; or as a square-ish market bag... So many options!
Add it to your Ravelry queue or favourites here: http://www.ravelry.com/patterns/library/double-spiral-square-motif
============================
PATTERN: DOUBLE SPIRAL SQUARE MOTIF
============================
Materials:
Two colours of yarn (Colour A and Colour B)
Hook, size appropriate to yarn
Scissors
Yarn needle
All stitches are in US terminology
sl st = slip stitch
ch = chain stitch
hdc = half double crochet
dc = double crochet
tr = treble crochet
Notes:
- The square spiral is made by alternating forward and reverse (1dc, 1tr) (1tr, 2dc) stitch sequence in the corners. This pattern makes a specific size - refer back to the Solid Granny Spiral Square pattern for information on how to make it bigger!
- Drop yarn means to pull up a large loop of the yarn, and let it go to start working with a different colour. When you go back to your large loop, pull it tight before continuing.
- All stitches are worked into the top of the stitch below, not into the space between stitches, unless otherwise specifically stated.
1. Making each spiral
square:


Ch 3, into ring (2dc, 2tr, 3dc, 2tr, 3dc). Pull up large loop of yarn and drop colour A.

Using colour B join into ring. Ch 3, 2 dc into ring. Into 3 ch loop of colour A, (dc, 2 tr, dc). dc into next 2 dc. In next tr
(dc, tr). In next tr (tr, 2 dc). dc in next 3 dc. In next tr (2dc, tr). In next
tr (tr, dc). Pull up large loop of yarn
and drop colour B.

Pick up colour A. With colour A, in 3 ch loop of colour B,
(dc, 2 tr, dc). dc in next 3 dc. In next tr (dc, tr). In next tr (tr, 2 dc). dc
in next 4 dc. In next tr (2dc, tr). In next tr (tr, dc). dc in next 7 dc. Pull
up long loop of yarn and drop colour A.

Pick up colour B. dc in next 4 dc. In next tr (dc, tr). In
next tr (tr, 2dc). dc in next 5 dc. dc in next tr. 2dc in next tr. Cut off,
pull end through.

Pick up colour A. In next tr (dc, tr). In next tr (tr, 2dc). dc in next 6 dc. In next tr (2 dc, tr). Pull up long loop of colour A, cut end,
leaving very long tail (approx. 60cm).

Make two spiral
squares in the same way.
2. Joining spirals
Lay out your squares according to the picture below. You should have one Colour A yarn at the top on one side, and one on the bottom on the other side.

Lay out your squares according to the picture below. You should have one Colour A yarn at the top on one side, and one on the bottom on the other side.
**With colour A tail, tr in next tr. Slip-stitch into the top of the last
stitch of colour B on the other square.

In same tr, dc, then slip-stitch into the top of the second-last stitch of colour B. (dc in next dc, slip-stitch into top of next colour B stitch) x4.**

In same tr, dc, then slip-stitch into the top of the second-last stitch of colour B. (dc in next dc, slip-stitch into top of next colour B stitch) x4.**
Repeat **to** with colour A loop at the other end of the join.


Ta dah!

Finish both Colour A threads & weave in ends. To tighten
up the tiny gap between the finishing points, weave the end into the opposite
side (so in the same direction as you were already going).

3. Outside row
Using colour B, join to either of the Colour B sideways dc
stitches. Then, 2ch, 2hdc in the same space.

**hdc in next 9 dc (don't forget the stitch that the sideways dc is made in).

In next tr (1hdc, 1dc). In next tr (1dc, 2hdc). hdc in next 9 dc. In next tr (2hdc, 1dc). In next tr (1dc, 1hdc). hdc in next 10 dc. hdc in next 2 tr. **
In next tr (1hdc, 1dc). In next tr (1dc, 2hdc). hdc in next 9 dc. In next tr (2hdc, 1dc). In next tr (1dc, 1hdc). hdc in next 10 dc. hdc in next 2 tr. **
3hdc in next Colour B sideways dc stitch. Repeat ** to **. Sl st in top of first ch2,
cut off and pull end through.

Weave in all your ends.