Of course, once the pasta machine is cracked out of the box, it only makes sense to make a big batch of at least two different kinds of pasta, so we made tomato and herb fettuccine as well ;) I'll put the recipes below, but here are some pictures from the experiments! All the pictures are courtesy of the amazing Bec Sellars, my partner in pasta crime.
I'd love to know if any of our readers try making these pasta recipes! Post photos in the comments!
[Edited to Add: I forgot to say before that it was all SO TASTY and we are still finding it difficult to stop eating the dried chocolate pasta off the clothesline, and the house is beautifully scented with chocolate.]
First, the tomato and herb fettuccine:
 |
| Lovely kneaded pasta dough :) |
 |
| The dough balls having a rest in the fridge |
 |
| The pile of rolled and cut fettuccine |
 |
| Going into the water... |
 |
| The delicious sauce - bacon, zucchini, mushrooms and cream |
 |
| Mmmm dishing up |
And now for the chocolate ravioli:
 |
| Started off with a raspberry champagne coulis! |
 |
| Melting chocolate for the pasta dough |
 |
| Such a glorious colour! |

 |
| Rolling rolling rolling |
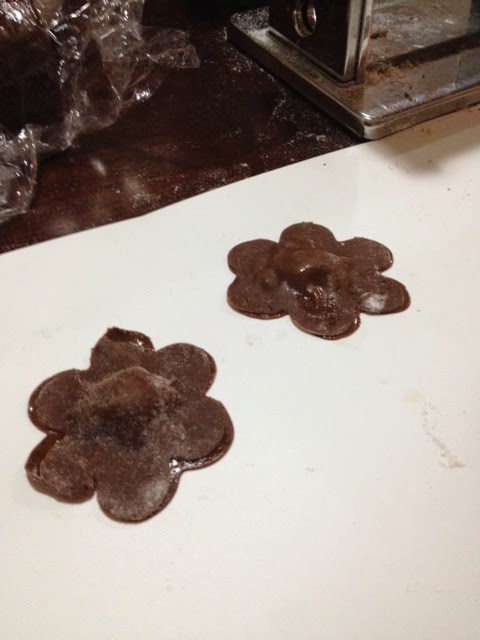

Flower ravioli! We decided pretty quickly that this shape was too hard and just made circles.

 |
| The finished product! |
 |
| We made too much chocolate dough, so some got hung up as fettuccine and spaghetti to dry :) |
---------------------------------------------------------------------------------------------
RECIPE: TOMATO AND HERB FETTUCINE
Adapted from "Pasta", edited by Valerie Ferguson
400g "00" flour
pinch of salt
3 eggs
30ml olive oil
60ml tomato paste
90ml chopped fresh herbs (we used equal quantities of parsley, chives and pizza thyme)
Extra flour for dusting
Method:
1. Put flour, salt and herbs in the bowl of a food processor. Process until well mixed and the herbs are chopped down as much as possible.
2. In a measuring jug mix together the eggs, olive oil and tomato paste. Slowly pour the wet ingredients into the food processor while it is running. Mix until the dough starts to form (it'll make lots of little wet balls).
3. Flour a clean work surface. Tip the dough mix out onto the surface and knead until the mixture comes together in a smooth, elastic dough, which springs back if you poke it with your finger :) Divide the dough in half, and roll each half into a smooth ball. Wrap well in cling wrap and put into the refrigerator for 40 minutes to rest.
4. Using a pasta machine (or a rolling pin, if you need a full body work out), roll out the pasta to very thin (we went to the 6th notch on the pasta machine), and then use the fettuccine attachment to cut into strips. Toss well with flour to stop the pasta strands sticking together.
5. Bring a large pot of water to the boil, with small handful of salt. Once it is at a rolling boil, drop the pasta in and stir well. It should be cooked in about 3 minutes, but keep testing after 2 minutes in case you prefer it done a bit more al dente!
6. Drain into a colander and rinse well with cold water to stop the cooking process. Then, either serve as is, or pour into your pasta sauce pan to thoroughly coat!
---------------------------------------------------------------------------------------------
RECIPE: CHOCOLATE RAVIOLI WITH RASPBERRY CHAMPAGNE COULIS
Adapted from who8thebean's recipe on Instructables
PASTA
160 grams dark chocolate roughly chopped
¼ cup thickened cream
3 cups “00” flour
½ cup Dutch cocoa powder
½ cup icing sugar
2 pinches finely ground black pepper
2 pinches salt
4 eggs
WHITE CHOCOLATE MASCARPONE FILLING
120g white chocolate
1/3 cup thick cream
100g mascarpone
1tsp vanilla extract
RASPBERRY CHAMPAGNE COULIS
2 cups frozen raspberries
2/3 cup castor sugar
4 tbsp sparkling white wine
2 tsp balsamic vinegar
EXTRAS
• 1 egg lightly whisked for sealing ravioli closed
• ½ - ¾ cup raspberries extra needed for stuffing the ravioli
Method:
Coulis
1. Set a small saucepan on the stove and add raspberries, sugar, champagne and vinegar. Simmer over low heat, stirring until sugar dissolves and the raspberries become soft and pulpy. Set aside to cool.
Ravioli filling
2. Set a mixing bowl over a saucepan of gently simmering water. Be careful not to allow the water to touch the bottom of the mixing bowl. Add the white chocolate melts and half of the thick cream. Stir continuously until chocolate is melted and the mixture is smooth. Remove from heat and set aside to cool slightly.
3. Meanwhile, whisk together the mascarpone, vanilla and remaining cream.
4. When your chocolate mixture has cooled for about 2-3 minutes gently whisk it into the mascarpone and cream mixture and ensure that it is well combined. Cover and set aside in the refrigerator to chill.
Pasta
5. Place the dark chocolate and
cream into a mixing bowl over gently simmering water and melt, stirring. Once melted, set aside to cool slightly.
6. Place flour, cocoa powder, icing sugar, pepper and salt in the food processor bowl and turn it on.
7. Add eggs, one at a time.
8. As the dough begins to come together add your melted chocolate and cream mixture and continue mixing until a firm but pliable dough is formed.
9. Now pull your dough out onto a lightly floured surface and give it a good kneading until it is smooth and soft. Cover and set aside for 30 minutes in the fridge to allow the gluten to relax.
Putting it all together!
10. Once your pasta has rested, cut it into 4 portions and run it through the pasta press folding and repeating the process 2 or 3 times before gradually reducing the setting. We decided on a very thin ravioli, and went to 8 on the pasta machine settings. This should give you a nice thin sheet of chocolate lasagna.
11. Take a cookie or scone cutter and cut circles in the dough.
12. Place a small teaspoon of the mascarpone mixture onto each ravioli and press a raspberry piece gently into the centre. Don't overstuff them, or it'll be easier for them to burst open during cooking!
13. Using a pastry brush or your fingers, spread a very small amount of egg wash around
each mound of stuffing – this will help the pasta to seal shut during cooking.
14. Take another circle of pasta and press down gently all around the filling and try to expel any air from the ravioli.
14. Take another circle of pasta and press down gently all around the filling and try to expel any air from the ravioli.
The Cooking
15. Prepare a large bowl of chilled water ready to plunge your freshly cooked
pasta straight into.
16. Bring a medium pot of water to the boil. Using a slotted spoon lower the parcels into the water one at a time for approximately 30 seconds.Remove from the boiling water and plunge into the cold water briefly to prevent further cooking.
16. Bring a medium pot of water to the boil. Using a slotted spoon lower the parcels into the water one at a time for approximately 30 seconds.Remove from the boiling water and plunge into the cold water briefly to prevent further cooking.
17. Serve with the raspberry coulis and any leftover mascarpone!
---------------------------------------------------------------------------------------------
---------------------------------------------------------------------------------------------