Friday 28 July 2017

FREE PATTERN: Origami Mystique Bag!

Hey everyone!

I'm so excited to share this pattern with you! Stylecraft sent me a bunch of their new-ish Mystique tape yarn (one ball of each colour) to have a play with, and as soon as I picked it up, the idea for this bag immediately popped into my head. I wanted to make something with flat, shaped pieces that then folded up like origami (Japanese paper craft) and crocheted together - so now I present the Origami Mystique Bag! Using just 4 balls of Mystique, this lovely no-sew bag is just the right size for 4 balls of Tweedy yarn ;) 


A little bit about the yarn first... Mystique is a non-woven tape yarn, made of polyester and viscose. It looks like a ribbon, and feels like someone put the fabricky-papery stuff hospital gowns are made of through a shredder. Don't let that put you off though - it is super soft, washes well, and crochets very nicely as a worsted/12 ply yarn. 

I have used four different colours as that's what I had and I quite like the ombre effect, but this bag would also be lovely in just two colours, one for each piece!


This is the first completed and published pattern I used my design journal for; it works! :D 


I hope you have as much fun making this bag as I did :) Queue or favourite it on Ravelry here: http://www.ravelry.com/patterns/library/origami-mystique-bag

-------------------------------------------------
FREE PATTERN: ORIGAMI MYSTIQUE BAG
-------------------------------------------------

Finished size: 27cm x 8cm base, 12cm(centre)-20cm high, +65cm strap

Materials

- 4 balls of Stylecraft Mystique (50g each)
- 5mm/H hook and 6mm/J hook
- 1"/2.5cm button
- Large yarn needle
- Scissors

All stitches are in US/American terminology

fsc - foundation sc (tutorial here)
ch - chain
sc - single crochet
slst - slip stitch


Instructions

Make two identical pieces, which we will then fold together to make the origami bag!

(Base)
Row 1: 10fsc. ch1, turn.

Rows 2-39: sc in each sc. ch1, turn.

Row 40: sc in each sc. DO NOT TURN.

(Side panel)

Row 41: ch 41. turn, sc in 2nd ch from hook and then each ch until you get back to the base. sc across end of base. 40fsc (start your first fsc in the side of the last base stitch). ch1, turn.


Row 42: sc in each fsc and sc of Row 41. ch1, turn.

Rows 43-62: skip first sc. sc in each sc. ch1, turn.

[At the end of Row 62 you should have 90sc]

Rows 63-72: skip first sc, slst in second sc, sc in third sc. sc in each sc, finishing in the 3rd last sc. ch1, turn.

[At the end of Row 72 you should have 10sc, and those 10sc will be in line with your base!]

(Strap)

Rows 73-111: sc in next 10sc. Ch1, turn.

Row 112: sc in next 10sc. Finish off.

For Piece 2, do not finish off after Row 112; rather we will join the two strap pieces together. 

Strap Join: Ch1, turn. *sc in next sc, slst into adjacent sc on the end of the strap of Piece 1*. Repeat * to * to the end of the row. Finish off.


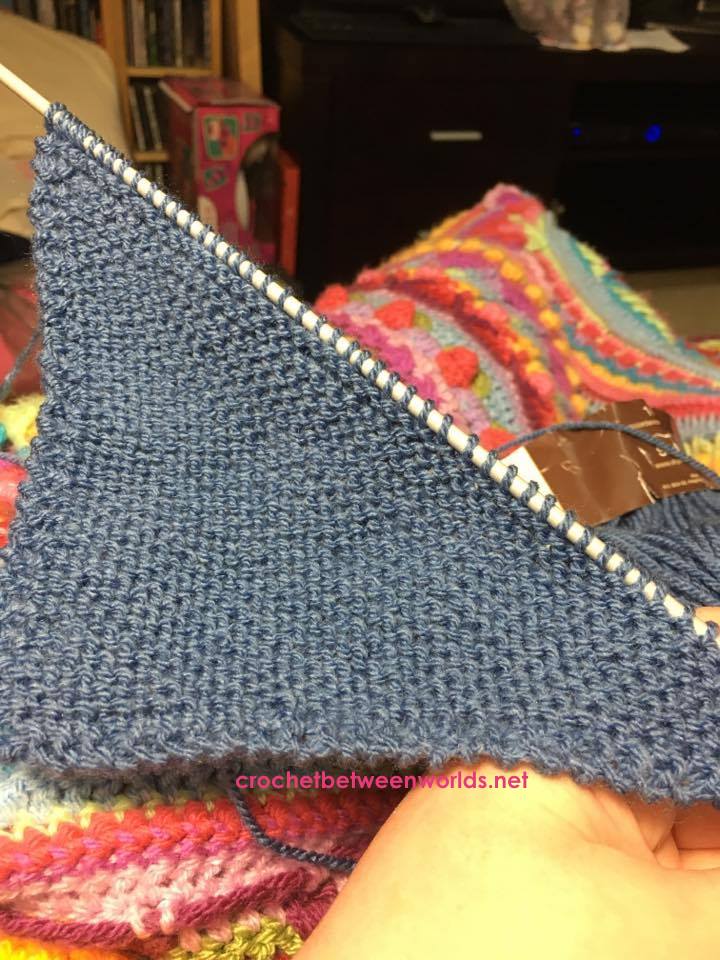
Now you have a very long, very strangely shaped single piece of crochet fabric. This photo is just of one piece, before joining the strap.


Edging

With your joining colour, join yarn with an sc in the end of Row 41 (at the corner of the triangle). Sc along the diagonal edge of the triangle, then along the strap, and back down the other side, finishing off at the opposite corner of the opposite triangle. Repeat on the other side.

Time to do some origami!

Construction

Place the two base pieces on top of each other, mirror image (so, you have one side triangle on each end). Pin the bases together to keep them secure while we mess around with the side panels.


Take the corners of the side triangle and pin them to the opposite end of the base. You can put one piece on the outside and one on the inside, or one each way on each side - it's totally up to you. Pin these together as well. Next, take your joining colour and the 6mm hook and single crochet the base and sides together. This is a bit hard going as you're working through 3 or 4 stitches at a time! At the short ends, don't forget to catch the end of the base piece as you work through the folded fabric.


Now we need to join the side pieces together so that your bag can actually hold something! Using the 6mm hook, join your joining yarn with a slst in one corner of the base where a side edge is on the outside. slst the two side pieces together in a straight line up to the middle of your bag. Pull your working loop through to the inside of the bag. The next bit can be a bit tricky - slst the inside edging to the outside layer of the bag, but just using loops on the back so that it doesn't show through to the front. 

Outside

Inside
Repeat on the other side, but this time, before you pull your working loop through in the middle, ch10 and slst to the last slst you did. This creates your button loop! Continue slipstitching the two pieces together along the inside. 


Sew on your button, weave in the ends, and you're done!

Monday 24 July 2017

July's Corner to Corner Blanket

Hi there!

As life is incredible busy at the moment, I needed an easy going crochet project to calm my mind and keep my hands busy in the evenings. So - of course - I turned to the corner to corner blanket pattern. My favorite blanket pattern of all time and my "meditation pattern". And since a very dear friends of ours told us that they expect a little girl later this year, the idea of a corner to corner baby blanket was born!


I finished the blanket last week and since then I can't decide if I should add a border or not. A border gives the blanket a neater look and also it may last longer. So that would speak for a border but... the blanket is so colorful, I can't quite decide which color to use. Usually I would add a moss stitch border but for this colorful blanket, it would be too much. Hmm. 


So for the moment the blanket remains "un-bordered". What is your take on this? 

I choose the colors for this blanket from my yarn stash. At first I wasn't 100 % sure they would work together but now I am very happy with it! I didn't note down the color names but if anyone wants to know, I will look it up. Just drop me a line! Oh, the yarn is Stylecraft Special DK of course. My favorite yarn for baby blankets because a) there are so many colors to choose from and b) it washes very well. 


Life is calming down a bit at the moment and man, I need that. Fingers crossed I can regain some of my energies over the next couple of weeks. At the moment I am working on a new amigurumi design idea. There is a vague notion that it might work, but I won't know until I crochet it up. Cross your fingers! What is on your hooks at the moment?


Take care
Anne


Thursday 20 July 2017

July Stylecraft Blogstars Meetup!

Hey everyone!

It was a freezing cold July evening for me, and a lovely sunny Saturday morning for Anne, when we skyped in to our very first Stylecraft Blogstars meeting!! Some of the photos in this post were taken by us, and some by Stylecraft :)

I live just down the road from another Blogstar, Angela from Get Knotted Yarn Craft, so we decided this was too good an opportunity to miss - hanging out together squishing wool, crocheting and chattering! The Captain even came along for the fun; he just can't miss a party, even if it's just two of us drinking tea in the kitchen :P 


There were 5 bloggers joining in from outside the UK - us and Angela (of course), plus Polly Plum from Every Trick on the Hook, and Zelna from Zooty Owl. After the usual technical difficulties (fortunately there was a handsome young man available to assist at Stylecraft!) we got underway! 


It was incredibly awesome to put voices to faces to names of some bloggers that we really love reading! Plus, who can have too many crochet friends? Attending the meetup in person were Lucia from Lucia's Fig Tree, Sandra from Cherry Heart, Julia from Hand Knitted Things, Helen from Josiekitten, Phil from The Twisted Yarn, Sarah from Annaboo's House, Catherine from Catherine's Crochet Corner, Kathryn from Crafternoon Treats, Heather from The Patchwork Heart and Emma Varnam. Sadly Lucy from Attic24 and Jane Crowfoot weren't able to come along - next time, ladies!


Next was what we were waiting for - a preview of the next season's yarn releases, both new yarns and new colours of existing yarns! There's not a lot we can talk about yet, but watch this space.

Annabelle and Emma took us around on the laptop to tour the room that was set up as the showroom for the day - so many pretties!!! Lucia brought a whole bunch of her blankets which were just glorious to see "in person" (rather than still photos) and there are some amazing upcoming designs to look forward to!


The last part (for us overseas people) was an awesome opportunity to play in piles of yarn. We were so glad to have all the little squares of Special DK colours as this made it so much easier to come up with colour combinations for a super secret upcoming thing! Even the Captain got in on the action :P


Overall we had a good time, mostly meeting the other wonderful Blogstars, and after disconnecting from Stylecraft (it was lunchtime in the UK, and the none of us felt up to learning tatting by teleconference!) we overseas bunch decided we would get together on Skype more regularly, as it was just so lovely to catch up, chat and crochet together! 

I think I've used up my entire monthly allowance of exclamation marks (!!) in this post!! :D 

Next Week - we're publishing our first pattern designed with our Blogstars yarn from Stylecraft, the intriguing Mystique yarn!

Tuesday 11 July 2017

Adventures in Knitting: "I can have a dark side too..."

Hey everyone!

Two weeks ago I took a great leap over to the dark side - I learned how to knit :o (Thanks to Tim Minchin for the post title!) 

I had done knitting in primary school (quite some time ago now!), and every so often picked up a set of needles to have a go, but just never really enjoyed it, or at least not enjoyed it as much as crochet. Crochet is faster, you can't drop stitches (or if you do it's not a drama in the slightest), and I can do it much better! I have always had the dream of knitting socks though, which seemed roughly equivalent to climbing Mount Everest but without the fun party times.

Then, my lovely friend Emily who can knit wonderfully asked if she could trade knitting lessons for advice about uni courses, and I felt ready. This was the moment. It was time.


After learning the basics - cast on, knit, purl, slip, increase, decrease, cast off - I was ready to start a real project. A knitted Wrap with Love square!


It worked! It came out a bit big, but after undoing one row I decided I didn't care that it was a bit too big. Knitting is wayyyy harder to frog :(


So, how hard could socks be? They thought I was mad, mad, MAD! *insane cackling* 

This gorgeous ball of Stylecraft's Head Over Heels sock yarn fell into an online shopping basket quite some time ago (I think I needed to get to $100 for free postage, and much better to spend a bit extra money on yarn than waste it on postage). It's a wool/nylon blend which I am told is ideal for socks, and didn't feel super itchy - maybe I could even tolerate having woolly socks? Spotlight provided 3mm knitting needles, and then it was time to choose a pattern

After much perusing of Ravelry, I chose the Just Plain Socks pattern by Talena Winters - It is free! Has ribbing! Multiple sizing options! Intermediate difficulty? Bah, I'm sure it will be fine.


Oh man, I thought knitting with two needles was complicated. Four? FOUR? It took me nearly two hours to knit the first inch of the cuff. Maybe knitting wasn't for me - I could nearly have a pair of crochet socks done in that amount of time. But I persevered. The yarn was working up in adorable stripes, and I was getting the hang of it. Slowly. 


The texture of the back of the heel was awesome, plus knitting goes way faster if you slip every second stitch ;) 


Now, it was heel turning time. This was the part I was most afraid of - I'd read about terror of turning heels in novels and thought this, this is where this experiment is going to fall apart.

Buuuut...

I did it! I just followed the pattern step by step, and then there was a heel turned. If I can turn heels, I can do ANYTHING.


Gusset? What on earth is a gusset? What on earth am I doing? Oh no wait, this is ok. Picking up stitches is ok. We can do this. I even did a Kitchener graft to close the toe (although I do need more practice...). 


I measured Kiah's foot as instructed, and knitted to the measurement as per the pattern, and then he put the first ever finished sock on. 

DISASTER.

It was too long! After the experiments with the Wrap with Love square, I was 100% not excited about doing any undoing. After a few minutes of blind panic, I remembered that my little brother James has enormous feet (AU mens size 13-14 - if I put my feet in his shoes, I can see my standard sized toes before the laces start). I texted him to see if he would be interested in hand-knitted socks and he said YES! Crisis averted!

Sock 2 went much faster, and I had lots of fun learning how to count rows to make it identical to the first one. 


I am so thrilled with the outcome, and totally pumped to make more socks and do more experiments in knitting! For now I have to get back to the crochet WIP pile but more knitting is definitely in my near future <3 

What are you favourite interesting knitting patterns for adventurous beginners? What techniques, stitches and skills should I learn next?

Tuesday 4 July 2017

Adventures in Designing

Hi everyone! 

Gosh, life gets busy for a few weeks then you turn around and it's July!? I am so not ready for it to be less than 6 months to Christmas!

It's been announced on Facebook and Instagram, but I don't think it's happened on here yet: Crochet Between Worlds have joined the Stylecraft Blogstars!! It's so exciting to be working with our favourite yarn brand, and to be on the same team as our crochet idols like Lucy from Attic24, Jane Crowfoot, Kathryn from Crafternoon Treats, Zelna Olivier... pretty mindblowing for us two little amateur crocheters. 


You can read our blurb on the Stylecraft website here: https://stylecraft-yarns.co.uk/blog/Anne-and-Michelle/

Ever since we got the gig, my brain has been buzzing even more with design ideas. One of the perks is that Stylecraft is happy to send us yarn for designing with, and I had not realised how much yarn budgeting was hampering my creative brain. 

But, being up at 3am because I had an idea for a design that wouldn't let me sleep anymore was not really assisting my health or my energy during the day to actually do things. It got so crazy that I had to do something to get ideas out of my head but not forgotten. I have a folder on my computer, but that's less convenient for jotting down thoughts or a quick sketch of an idea.

Meet my design journal! Like many people I am a total sucker for pretty stationery, and this Leuchtturm A5 diary is SO pretty. It has a hard cover so I can whip it out and scribble anytime, anywhere, and an elastic to hold it shut when I go overboard sticking photos and printed layouts in it :P


I'm eventually going to decorate the rest of the cover with pretty crochet pictures, but my photo printer is at the doctor's at the moment. 

Inside is also really cool - the pages are numbered, and there's an index at the front! I'm enjoying just opening a random page to jot down an idea, then adding a title to the index! I am finding the blank space more thrilling than daunting - so much more room to put more ideas!


The pages are perfect for designing - rather than being lined or blank, each page has a grid of dots. This keeps my handwriting (mostly) straight but also makes it easy to sketch shapes of ideas evenly. 


I'm just putting the final touches on this origami bag design, then it'll be published for free here!! 

Do you have a recording system for designing? How do you keep track of ideas?

Next time: Adventures in Sock Knitting!

Hugs,
Michelle